January 2018
Make Custom AR Lenses – Lens Studio Tutorial
In December 2017, Snapchat released the program Lens Studio, which allows users to make their own custom 3D augmented reality snapchat filters (‘lenses’).
Not too many people are making these at the time of writing this (January 2018), but I’m sure this will blow up pretty soon.
Especially when companies find out about the possibilities in advertising with this.
I made some of these lenses when the program just launched, and thanks to Reddit (specifically /r/SnapLenses) there is now a demand for them (mostly for memes, of course).
Snapchat has invited me to become an Official Lens Creator, which means I now have a creators’ page on their website, where you can find some of my lenses.
If you want to hire me to make lenses for you, contact me!
![]()
Walkthrough
I will be explaining how I made this odd lens with a 3D scan of myself:
To recreate this using Lens Studio, you’ll need a 3D model of yourself first.
I made one using the Structure Scanner on an iPad with the app ItSeez3D, and animated that with Mixamo
(which is way faster than rigging and animating it yourself).
Make sure your 3D model is under 65.535 vertices, as Android doesn’t support more than that. Here you can find everything about optimization for a lens.
Mixamo is great. Let’s select some good dance moves, apply them to my scan, and export that as an FBX file:
It’s getting pretty creepy already. Don’t worry – it gets much worse.
Let’s open up Lens Studio and pick the “Animated Object”-template. This’ll make the right placeholders for touch interaction, which saves some time.
After removing the template objects, this what the Lens Studio interface looks like:
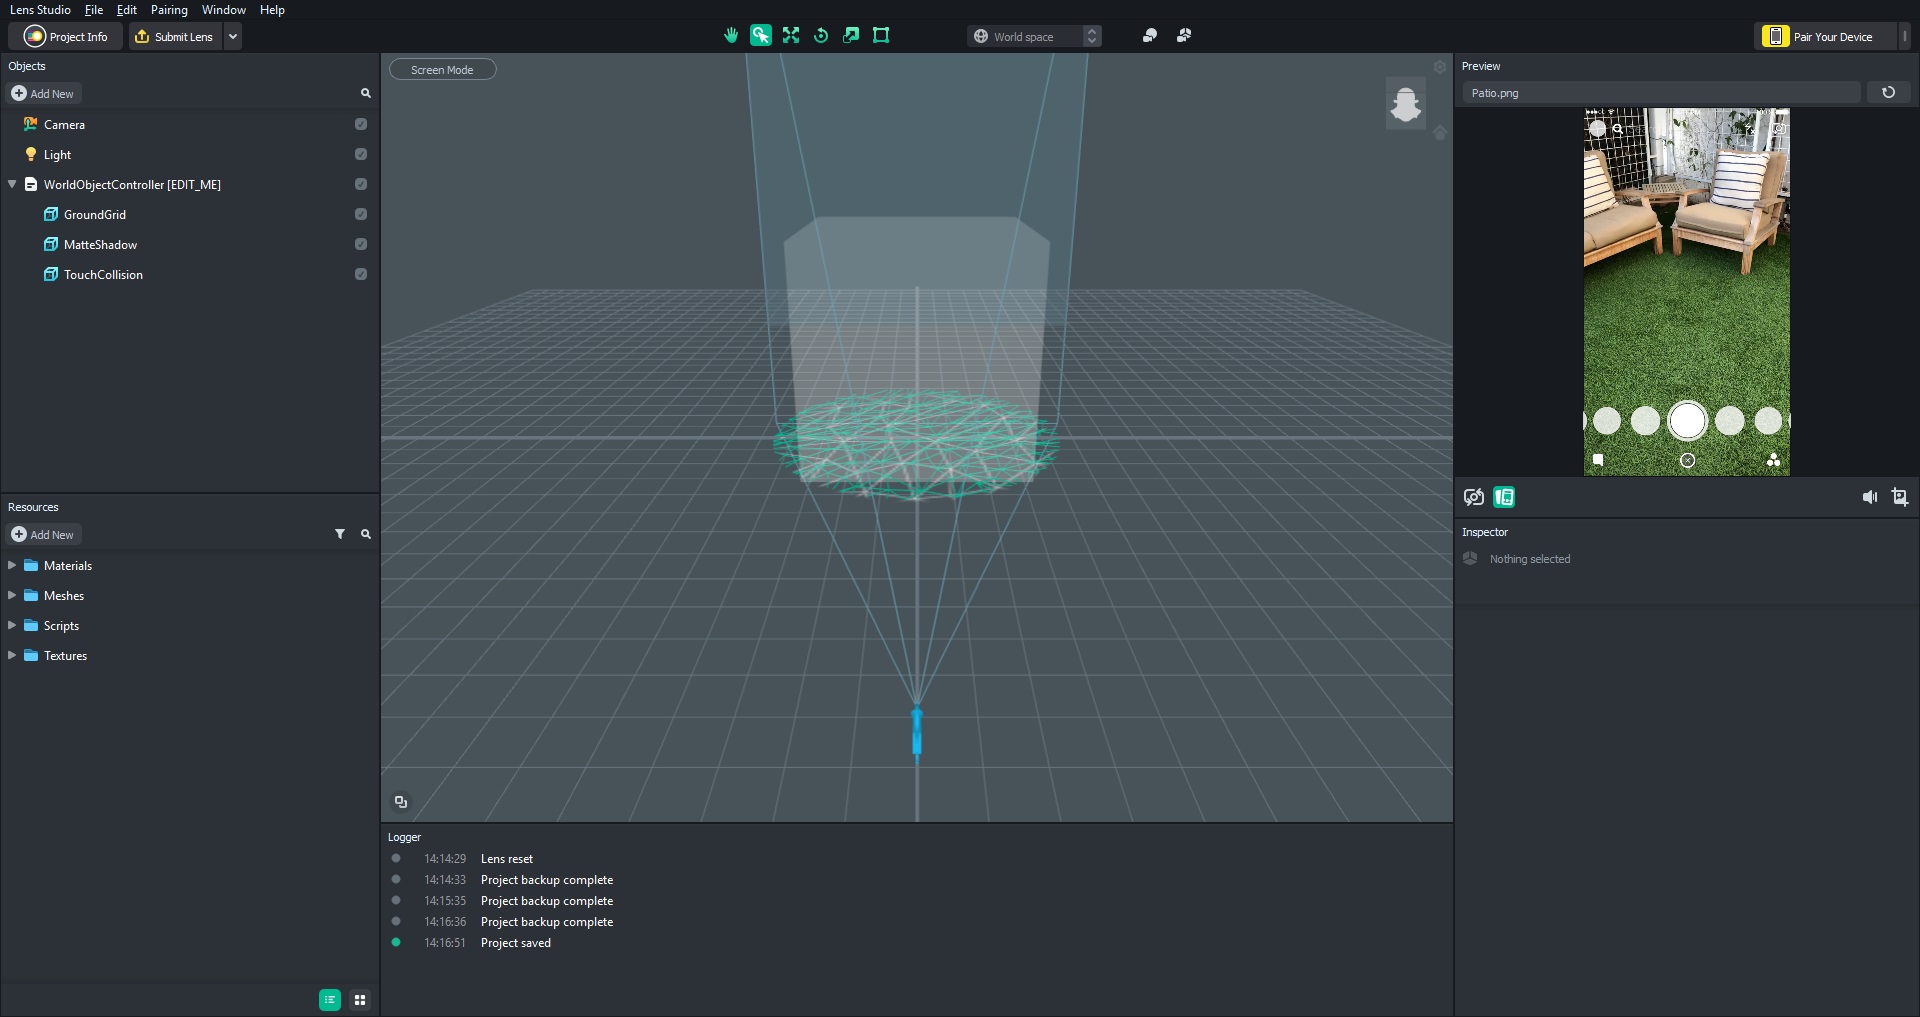
Under “Resources” > “Add New” > “Import Files”, select the downloaded FBX. It’ll automatically be placed in the “Object” list, but it should be resized a little to make it visible.
Drag it into the “World Object Controller”, as it wouldn’t respond to touch otherwise.
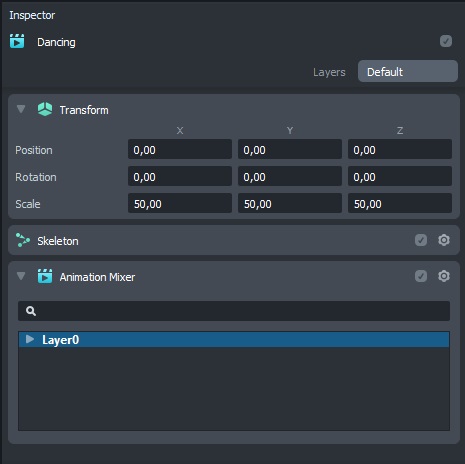
Now in the inspector of the FBX file, you’ll see it has an animation, named ‘layer0’:
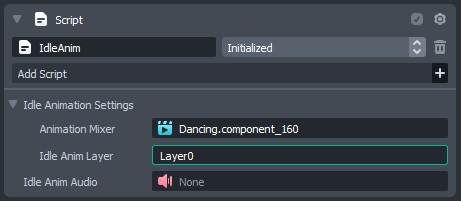
Link the IdleAnim-script in the WorldObjectController to this animation, by selecting the right Animation Mixer and typing ‘Layer0’ in the Script fields:
The Preview window should be looking something like this now. The next step will be applying the textures.
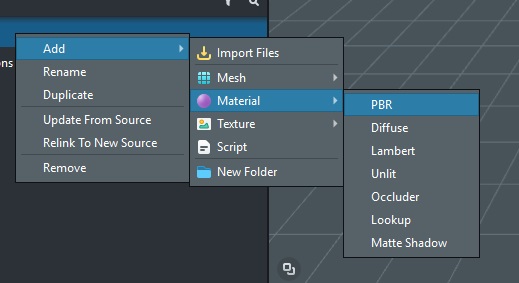
Snapchat works with PBR materials, which means it works very well together with Substance Painter (but we’re not using that right now).
Add a new PBR material, and apply it in the mesh of your dancing objects under Mesh Visual:
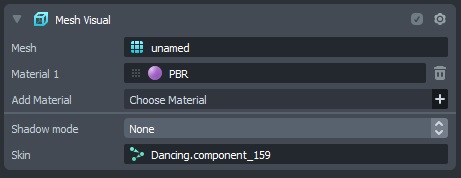
In the PBR material, replace the Base color texture with the one your 3D scanner produced.
I decided to animate the texture of my shirt as well, with the classic dancing hotdog Snapchat made a while back.
Make sure to have the animation exported as an image sequence (and use PNG, as this also supports an alpha channel for transparancy).
Lens Studio will compress the images, so you should not do that yourself. The lens has a maximum file size of 4MB, so keep the sequences short!
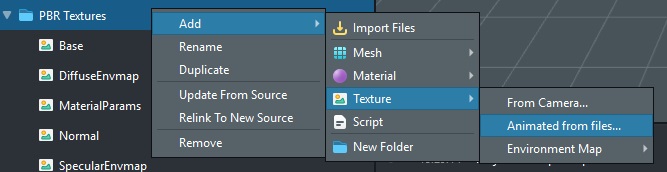
To import an animated texture, go to “Add New” > “Texture” > “Animated form files…” and select all files of the sequence:
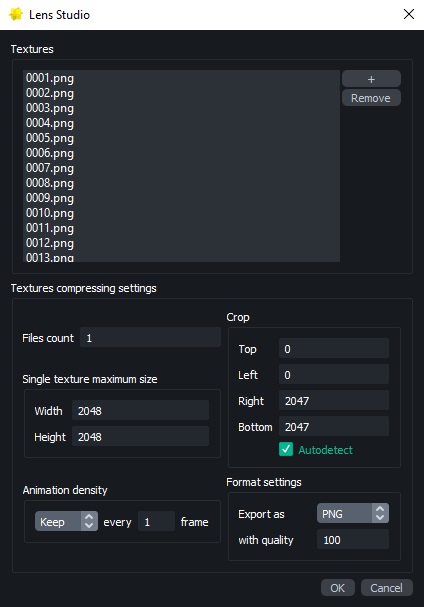
The default settings on the next screen are usually already correct. However, you may want to tweak the quality or resolution if the compression seems a little too much. The maximum resolution of textures is 2048×2048.
Set the animation speed in the inspector, and enable “Always play”.
Now apply this animated texture to the Base texture of you PBR material, and it’s done!
The next step is to get Snapchat to verify this lens, so it can be shared with a snapcode.
Give the lens an icon and a name in “Project Info” (note: the icon has to be a square PNG), and click “Submit Lens”.
Snapchat will now check for any copyright issues or violations of the Terms and Conditions of Snaplenses.
After a while, your lens will probably be verified and you get your own SnapCode (a QR-code for Snapchat), like this one.
Tap and hold on Snapchat to scan it: