November 2017
Nuke NDK Guide
This is a start-to-finish tutorial that will help you make Nuke plugins using the Nuke NDK, and it will cover both Windows and Linux.
Coding in C++ plays a big part in this, but first we’ll have to set up some things (especially on Windows).
The code you write will almost always work for both Windows and Linux, but compiling it for a specific OS is only possible by compiling it using that OS.
Windows:
Windows + Linux:
Visual Studio Installation
The official Nuke NDK installation page is very clear on one issue:
Nuke plugins should be written and compiled in Visual Studio 2010 – Manifest Version 10.0.30319 – and nothing else.
It would have been great if the documentation was just as clear on every other aspect of setting up VS for Windows.
But sadly, for someone who is inexperienced in this field, like me, things quickly get complicated.
I made this step-by-step explanation for setting up Visual Studio to compile for Nuke.
I will also cover writing and compiling a very basic plugin in C++.
I use VS 2017, because VS 2010 is a pain. And because it works.
(I know, very irresponsible of me.)
Use whatever version you want, using the supported VS 2010 is recommended.
Download my example Visual Studio 2017 project and strip it of its contents,
or follow the instructions down below (don’t worry, they are not as intimidating as they seem).
Visual Studio Instructions
- Install VS2010, or a newer version of Visual Studio (Community is free if you log in with Microsoft account). Create a new empty C++ project.
- Make a new C++ file in that project.
- In the main Visual Studio window, set the Solution Configurations (in the toolbar) to “Release” and “x64“.
- Go to “Project” > “<Project Name> Properties…”
- Make sure to set the following settings in the top of that Properties window:
- Configuration: Release
- Platform: Active(x64)
![]()
- The following settings should be applied in the Properties:
General
Target Extension
.dll
Configuration Type
Dynamic Library (.dll)
C/C++
General
Additional Include Directories
C:\Program Files\<Your Nuke version; e.g. Nuke11.0v1>\include
SDL Checks
<leave empty!>
Linker
General
Output File
$(OutDir)$(ProjectName).dll
Additional Library Directories
C:\Program Files\<Your Nuke version; e.g. Nuke11.0v1>
Input
Additional Dependencies
DDImage.lib;glew32.lib;%(AdditionalDependencies)
- If you want to automatically run Nuke and load your plugin once you compile:
Build Events
Post-Build Event
copy /Y “$(TargetDir)$(ProjectName).dll” “$(USERPROFILE)\.nuke\$(ProjectName).dll”
“C:\Program Files\<Your Nuke version; e.g. Nuke11.0v1>\<Nuke Executable; eg. Nuke11.0.exe>” –nukex

-
Go to your “.nuke”-directory, and create a new file called “menu.py”. If it already exists, open it.
Add the following text to the end of that file:
|
0 1 |
toolb = nuke.menu('Nodes') toolb.addCommand('<Plugin Name>', "nuke.createNode('<Plugin Name>')") |
- The Nuke NDK has a version check in one of its files, which throws errors if the compiler is not VS2010. Which can be removed, if you want to.
Go to “<drive letter>:\Program Files\<Nuke Version, e.g. Nuke11.0v1>\include\DDImage” and search for “DDImage_API.h”.
Open it (you’ll need admin rights) and comment out line 29 (the ‘#error’ for _MSC_VER != 1900).
I know, it’s muddy. It’s muddy and it works. Stick to VS 2010 if you want no part in this.
Visual Studio and NDK
Download my example project using that button – it’s the ShiftRGB plugin, with which you can test if compiling really works.
Before compiling, check if your Nuke path is set to the newest version in these locations:
“Project” > “<Plugin Name> Properties…” > “C/C++” > “Additional Include Directories”
“Project” > “<Plugin Name> Properties…” > “Build Events” > “Command Line”
And check the Windows SDK version here (set it to the newest recommended one):
“Project” > “<Plugin Name> Properties…” > “General” > “Windows SDK Version”
Also, go check if the “menu.py” in your .nuke folder is correctly loading the dll file. See step 8 in the instructions for details on this.
If you want to test this dll file before opening the project in Visual Studio, copy the file
“NukeNDK_ExampleProject.zip\ShiftRGB\x64\Release\ShiftRGB.dll” to your .nuke folder.
C++
This page by The Foundry is an amazing place to start learning C++ in combination with the Nuke NDK,
because there are actual example C++ files for existing Nuke nodes (like Constant, SimpleBlur, Deepcrop) available for download.
The Nuke NDK Developer Guide is also a great place to read about conventions and terminology.
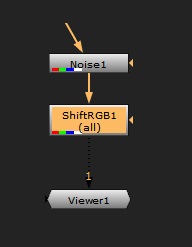
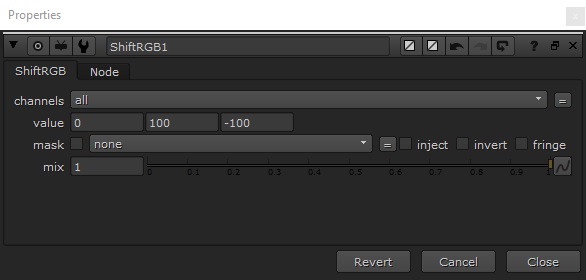
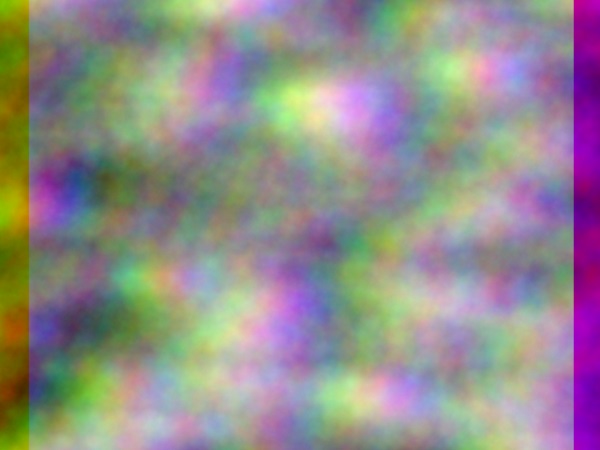
Let’s look at the code in my example project ShiftRGB. This plugin has three input integer boxes, one for each channel R, G, and B.
It horizontally translates the channels according to that value, and that’s all.
First, we have to import the header files and namespace that will allow C++ to use the coding functions Nuke provides.
|
0 1 2 3 4 |
#include "DDImage/Row.h" #include "DDImage/Knobs.h" #include "DDImage/NukeWrapper.h" using namespace DD::Image; |
Then, let’s name the plugin and give it a Help-function for Nuke to understand.
|
0 1 |
static const char* const CLASS = "ShiftRGB"; // Name of the class (should be the same as the name of the final .dll file) static const char* const HELP = "Example script - Horizontally shift RGB (individually)"; // The tooltip you see when hovering above the Help-button in Nuke |
Make sure you name the final compiled file the same as the class (in our case “ShiftRGB”), as Nuke will be looking for that filename.
In the main class we define the variables that can be influenced by user knobs in Nuke.
In this case, we’ll be adding a knob that has 3 integer values (the offset for each channel).
Nuke also wants the plugin to have a _validate, _request, and an _engine. Validate and Request are called once,
Engine is continuously called (multi-threaded).
We also create a function for the knobs to be loaded in the UI.
|
0 1 2 3 4 5 6 7 8 9 10 11 12 13 14 15 16 17 18 |
class ShiftRGB : public Iop { int value[3]; // Create user variable for per-channel translation public: ShiftRGB(Node* node) : Iop(node) { // Set all default values here value[0] = value[1] = value[2] = 0; // For instance, all items in the int value[3] should be 0 by default } void _validate(bool); // This will define the output image, like the size and channels it will have void _request(int x, int y, int r, int t, ChannelMask channels, int count); // This requests information from the input void engine(int y, int x, int r, ChannelMask, Row & row); // Where the calculations take place const char* Class() const { return d.name; } const char* node_help() const { return HELP; } virtual void knobs(Knob_Callback); // This is where knobs can be assigned static const Iop::Description d; // Make Nuke understand this node (at the bottom of the script more information on this) }; |
In the Validate and Request, fetch all image data from the first input (input0).
|
0 1 2 3 4 5 6 |
void ShiftRGB::_validate(bool for_real) { copy_info(); // Output image will have the same properties as the input } void ShiftRGB::_request(int x, int y, int r, int t, ChannelMask channels, int count) { input0().request(x, y, r, t, channels, count); // Request the image data from input 0 } |
Now comes the most important part: the Engine. This will be called for each row (a horizontal line pixels), for each channel.
Keep this as lightweight as possible, as this can easily crash your Nuke.
In the Engine, we’re going to iterate through each channel (z), and check the knob value for that channel (value[z]).
Then, for each pixel in each row in each channel, check if that pixel index + the knob value is still a valid pixel index.
If it is, show the input on that new pixel index at the current pixel. Otherwise, output black (a value of zero).
This is what that would look like in C++:
|
0 1 2 3 4 5 6 7 8 9 10 11 12 13 14 15 16 17 18 19 20 21 22 |
void ShiftRGB::engine(int y, int x, int r, ChannelMask channels, Row& row) { row.get(input0(), y, x, r, channels); // Fetch the data row foreach(z, channels) { // Do for each channel (0, 1, 2 = R, G, B) int rowlength = info().r(); // Get width of screen const int PixOffset = value[colourIndex(z)]; // Get current channel offset value for values 0, 1, 2. If higher than 2, pick value[0] const float* INP = row[z]; // Copy the pointer float* OUTP = row.writable(z); // Allocate the output pointer for (int X = x; X < r; X++) { // For each horizontal pixel within the row int NewPixel = int(X + PixOffset); // NewPixel = X + PixOffset if (!(NewPixel > 0 && NewPixel < rowlength)) { // Check the pixel index for illegal values NewPixel = -1; // When NewPixel does not exist within array INP, assign error value } float NewColor = (NewPixel == -1) ? 0 : INP[NewPixel]; // NewColor = INP value at pixel NewPixel, except if the value is -1 OUTP[X] = NewColor; // Set OUTP at X to NewColour } } } |
Now we only have to create the user knob for the node, in the Knobs void.
Nuke also needs some information about this node, like what its UI-name is (when searching nodes).
This should be the same as the name of the final compiled file!
|
0 1 2 3 4 5 6 7 8 |
void ShiftRGB::knobs(Knob_Callback f) { MultiInt_knob(f, value, 3, "value"); // Make the user knob Tooltip(f, "Set the translation in R, G, and B."); // Set the tooltip for this knob } static Iop* build(Node *node) { return new NukeWrapper(new ShiftRGB(node)); } const Iop::Description ShiftRGB::d("ShiftRGB", "ShiftRGB", build); // Nuke reads this to get the name of your plugin in the UI. Make sure this is the same as the name of the class and the final .dll file! |
Compiling
Windows
Compiling your code in Visual Studio is just a matter of hitting “Build” > “Build Solution” now.
Visual Studio will print the location of your compiled .dll file in the output console,
and if you followed steps 7 and 8 in the “Visual Studio Instructions” earlier, Nuke will start and your plugin will be loaded!
Linux
Make sure that you’ve got your .cpp file (which is just a text file with your code in it) and you have opened the Linux terminal.
Now, make sure the terminal is running from the directory your .cpp file is in. You can do this by entering:
cd <path/to/folder>
Compiling is a lot less of a hassle on Linux – all that’s left to do now is to enter the following:
gcc -shared -fPIC -I”<Nuke installation folder/include>” -o “<FileName>.so” “<FileName>.cpp”
The “FileName” is the same as the name of the C++ class. If you’re following the example on this page, it should be “ShiftRGB”.
The “Nuke installation folder/include” is the path where the Nuke version you’re compiling for is installed.
The reason this path is necessary is that, in order to compile something, the compiler will need Nuke’s so-called header files (which are stored there).
The path will probably look something like this: “/usr/local/Nuke (+version number)/”.
After you’ve done this, there should be a file with the same name as your .cpp file, but with a .so extension instead. This is your final plugin!
Install it for Nuke like any other plugin – see step 8 in the Visual Studio Instructions if you need help with that!
Opening up Nuke, and finding the plugin
What to do now?
The Nuke NDK can be used to write heavy image processing algorithms.
With knowing C++ also comes the ability to write Blinkscript kernels (using the BlinkScript-node).
Blink script is a way to implement C++ in Nuke, without having to use Visual Studio and all that. It is, however, limited and less efficient.
This also goes the other way around: in C++, you can call the Blink API and get Blink functionality.
This PixelSort gizmo and this PixelRepeat one are both written in Blinkscript!
For more information on Blink, check out the Blink documentation.
There’s also this Foundry Community that helps you with questions about developing for Nuke (both Blink and C++)!